Thursday, 28 November 2013

Polygon Shoe Texturing

After modelling the shoe, the next step was to UV map it. I've always used Maya's tools for UV mapping, however as time has been disappearing I decided to use a software called UVLayout to help speed the process along. Watched tutorials to learn how to use it, and the UV maps were ready rather quickly! Upon realizing that through using UVLayout, my shoe was now an .obj which combined my shoe into one object, I decided to UV map different parts of the shoe separately by exporting different parts of the shoe as .obj's.

The finished UV map for the main part of the shoe, used a temporary checkered texture to check for distortion. Exported the UV snapshots ready for texturing.

Worked with Photoshop and Maya side by side whilst painting the textures.

I used high res photos of the real-life shoe and merged them together in Photoshop, also used the paint and clone brush tool.

I exported the UV snapshots as a large file size, which has allowed me to adjust image sizes to what is needed - as it is simple to decrease the size but not easy to increase quality.

Finished textures painted onto the UV maps:

Laces 1

Laces 2

Inside and outside of shoe

Inner sole of shoe
shoe heel


Finished textures on the shoe in Maya:


Tuesday, 26 November 2013

"I have an idea!"

After weeks of ideas being thrown around and not deciding upon an idea to go with for our group project, I got an idea, pitched it to the group and all agreed to stick with this one. Now that we have a story idea, we can begin pre-production:
- developing the story/script
- creating storyboards
- editing together animatics
- concept art work
- character design
- environment design

IDEA - 
It's autumn/winter time of year.
An owner gives her dog a biscuit which he takes outside into the garden.
Before he gets a chance to eat it, a bird swoops in and snatches it!
Disappointed, the dog goes and asks his owner for another, which confuses her as she just gave her dog a biscuit?
The same thing happens over the next few days with different comical scenarios of the birds taking the dog's biscuits.
Until one day the dog ends up in a tug of war with one of the birds.
The owner spots this happening from the kitchen window and races outside to choo the bird away! Caw caw!
The owner then realizes that the bird's have been stealing all of the dog's biscuits.
The last shot see's the owner hanging a bird feeder in the garden for the hungry birds and the dog happily munching on his own biscuit finally!


Some concept sketches to explain the story:


This encompasses everything each of us would like to have in a project for each of our own goals: 

a human character and an animal character to rig, 
2 characters with opposite personalities (the dog and the bird), 
an underlying/abstract message, 
and plenty of opportunity for entertaining, humorous, and empathetic performances to animate.

INSPIRATION -

(personally I am inspired by humorous situations observed in everyday life)

Birdbox's Carpark

Simon's Cat:
Snow Business

Nut Again

Fed Up - Simon's Sister's Dog with the RSPCA

Alberto Beguerie's The Case of the Broken Lamphttps://vimeo.com/76356337

UNDERLYING MESSAGE -
Food for nature, looking after local wildlife: 

http://www.rspb.org.uk/advice/helpingbirds/decline/birdsdecline.aspx
http://www.rspb.org.uk/advice/helpingbirds/feeding/index.aspx

Thursday, 21 November 2013

Idea Brainstorming

A few doodles and sketches, brainstorming potential ideas for the group project, had a group meeting to discuss everyone's ideas:


Wednesday, 20 November 2013

Polygon Shoe Modelling

Setting up the image planes for reference:

 Used the 'Create Polygon Tool' to draw the outline from Top View:

Used 'Interactive Split Tool' to add lines and divide up the mesh:

Shaping the mesh from Top View:

Began working from Side View, extruded shape up:


Created a Non-linear Deformer to 'Bend' the shape, also extruded the heel down:


Created the side of the shoe in the same way as the bottom of the shoe:

Creating the front of the shoe:

Used the different image planes as reference to shape the front of the shoe:

Mirrored the front of the shoe and merged the two together before extruding the tongue:

Combined the side and front mesh as I found trying to shape both parts separately was more difficult and time-consuming to match up edges:

Smooth preview:

Extracted the side mesh in order to mirror across to the other side and merge with the original:

Used 'Interactive Split Tool' to create holes in the mesh for the laces:

Done the same for the other side:


Adding in wrinkles to the front of the shoe, by adding in triangles to the mesh:

More wrinkles:

Started with a polygon cylinder, extruded and shaped as I went along to creating the laces. The laces are made up of the threaded ones, the 2 looped laces and the knotted lace:

Extruded the edge around the ankle for the cushioned part of the shoe:

Duplicated parts of the shoe and scaled it in to create the inner part of the shoe, after realising that the inner part of the shoe has a different texture to the outer shoe. Even though you can pipe 2 textures into 1 mesh to show up on opposite sides; I felt this would be easier and looks more realistic:

Smoothed preview of the whole shoe:

How the Outliner is looking at the moment:


Thursday, 14 November 2013

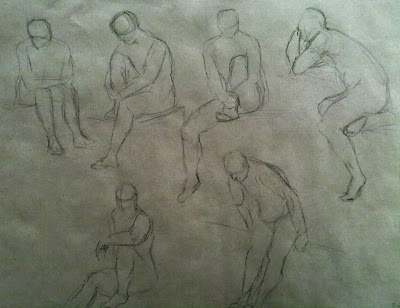
Life Drawing in Week 10

With the rescheduling of one of our normal classes I managed to get along to another life drawing class. I used my usual charcoal pencils and chalk to produce these drawings:

2 minute poses

2-10 minute poses

10 minute poses

8-10 minutes poses