Our first lesson was an introduction to modelling with NURBS:

Most of the 3D modelling I've done previously has been with polygons. The only NURBS modelling I've done before was to model some iron railings in a mostly polygon-created town environment:
 |
| simple railings made with NURBS |
Here are a few of the basic techniques we learnt (This may seem like detailed blogging but it also acts as a reference/guide for me to look back at if I forget how to do something):
Creating a wall:
 |
| Using the CV Curve Tool draw out line shape (hold 'shift' to snap into a straight line) |
 |
| Once line is drawn, press 'enter' to complete |
 |
| 'Ctrl + D' to duplicate and move across |
 |
| Select both lines and 'Loft' to create the wall |
 |
| To add more detail to the wall it needs more points to select and manipulate; to do this first Right click and select 'Isoparm' |
 |
| Hold 'shift' and drag new isoparms down - however many needed from each side |
 |
| To turn the yellow dotted isoparms into solid green lines, select 'Insert Isoparms' |
 |
| Can then Right click and select 'Control Vertex' to manipulate points on the wall |
Create a pipe/wire:
 |
| Create a curved shaped using CV Curve Tool |
 |
| Press 'enter' to finish drawing the curve |
 |
| Create a NURBS Circle |
 |
| Select the 'Move Tool' for the circle. Hold 'C' and middle mouse click on the curve to snap the circle to it |
 |
| Drag circle to the end of the curve and rotate to roughly 90 degrees to the curve |
 |
| With the circle selected, 'shift' click the curve and go to the 'Surfaces' menu and click the option box next to 'Extrude' |
 |
| Make sure 'Path Direction' is highlighted next to 'Orientation' and then 'Apply' or 'Extrude' to create the pipe/wire object |
Create a square from a NURBS circle:
 |
| From what I quickly wrote down in my notebook, I thought after a NURBS circle was created with 12 points, a square was created by snapping vertex together but I can't work out how to do that so maybe the points were just scaled together? |
 |
| This shape was made by moving and scaling vertex points. |
 |
| Duplicate and scale down, 'loft' between both of the squares |
 |
| To "close end" just scale smaller curve down until it is too small to see |
 |
| The finished shape |
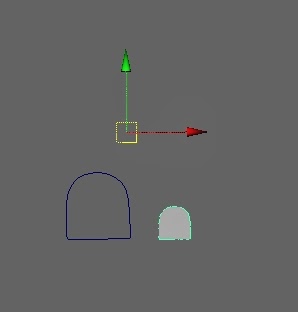
I found another way - don't know if this is a good way to create a square from a circle but I guess I'll find that out once I start my NURBS modelling, by creating a 4-point circle with Linear Degree as highlighted in image (below)

Revolve:
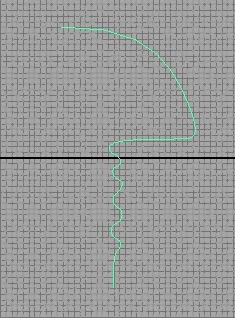 |
| Use CV Curve Tool to draw out shape |
 |
| 'Center Pivot', then press 'insert' and hold 'c', middle mouse click on curve to move the pivot point to the end of the curve |
 |
| Under the 'Surfaces' menu, select 'Revolve' to create object |
 |
| To close a curve you have just drawn with the CV Curve Tool, use 'Open/Close Curves' |
 |
| Right click and 'Control Vertex' to move points around |
 |
| Select the curve and a surface, then 'Project Curve on Surface' |
 |
| Select the new projection... |
 |
| ...and select the surface, select 'Trim Tool', click on the surface, then press 'enter' |
 |
| A hole has now been created in the surface |
 |
| Right click and select 'Trim Edge' to select the edge |
 |
| The theory behind creating the above objects is to 'Duplicate NURBS Patches' and move the duplicate curve back and then 'loft' between the two to create the "tunnel" |


